Why VXLAN…
In the world of EVPN, ACI, VXLAN, Overlay and Underlay Networking it is sometimes advantageous to take a step back and look at the basic elements that make up these solutions
VXLAN came about to address the need for IP mobility within the Data Center. The ability to move workloads between compute resources that maintain the same address space has been an expectation of VMWare admins and Infrastructure Managers ever since the term VMotion was uttered.
Network Engineers were expected to make the network accommodate this requirement and often resorted to less than best practice solutions and “quick-wins” just to kick the ball out of their court and get the job done. Stretching multiple large L2 segments through, and between Data Centers should turn any Network Engineers stomach. Even if you do remember the word “add” when configuring the trunks you still have to live with that unnerving feeling that you have just extended the failure domain and now have all that lovely broadcast, unknown-unicast and multicast traffic traveling even further through the network.
VXLAN on its own isn’t the answer to all our problems but when combined with a control-plane mechanism it can get us pretty close. VXLAN on its own can allow us to extend L2 over L3 in the DC but we are still reliant on the standard L2 flood and learn way of operation.
Lab…
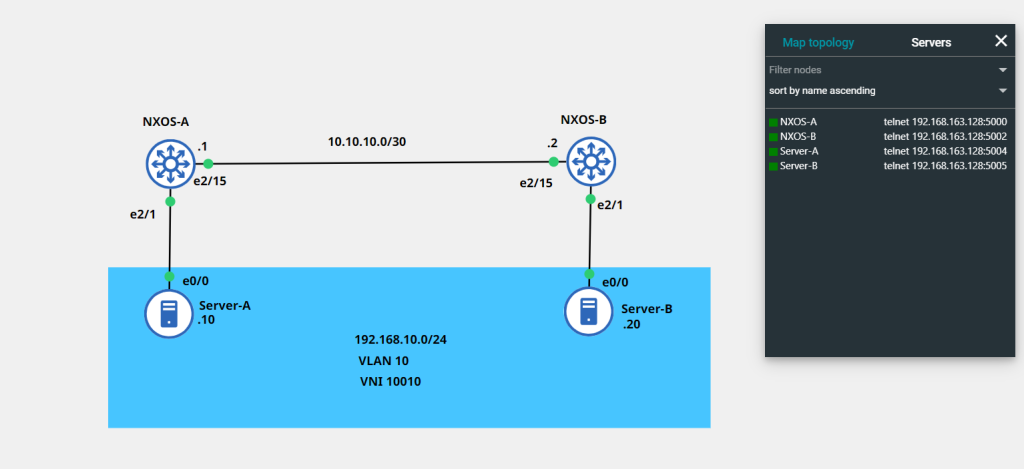
In the Lab I will be extending a single VLAN over a L3 Link using VXLAN and Multicast. I will be using 2 NX-OSv switches back to back – no CLOS fabrics just yet…
I’ve omitted the initial addressing of interfaces from the write-up – please see topology below
OSPF Underlay…
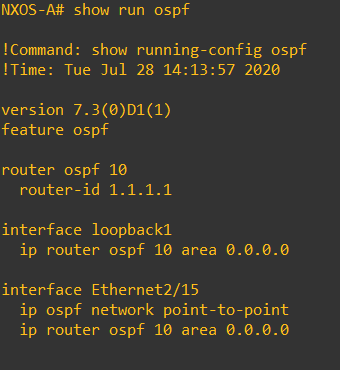
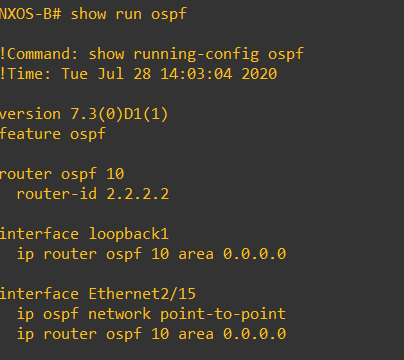
In order to allow our VXLAN overlay between our 2 NX-OSv endpoints we need to have a stable underlay network, I have chosen OSPF for simplicity. Each NX-OSv will have a loopback that will serve as the OSPF RID but will also come into use as we configure the VXLAN overlay
The OSPF config isn’t anything out of the ordinary – OSPF point-to-point has been chosen to ensure no DR/BDR election. Note how to loopbacks have been propagated into OSPF – this is important as connectivity between loopbacks is key for the VXLAN
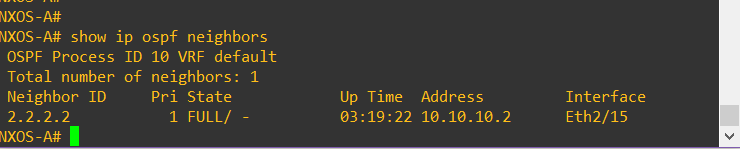
Lets check those OSPF neighbors – They are fully adjacent as we expect.
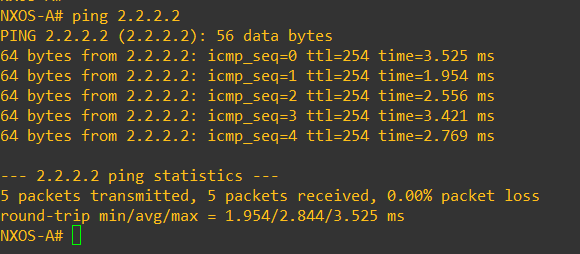
Lets check the connectivity between loopbacks on the NX-OSv endpoints, as these will be used as the source for our VXLAN NVE source interfaces (The logical interfaces that terminate the VXLAN tunnels on each switch) .
Pings look good!
Multicast Underlay
In order for the Tunnel Endpoints (VTEPs) to know where to forward the traffic there are a couple of mechanisms that can be used ingress-replication or multicast. Ingress replication tends to be used in situations where multicast cannot be used. Ingress replication tends not to be as scalable as multicast due the requirement for static neighborship commands on each NVE, with Multicast forwarding each NVE just needs to join a multicast group.
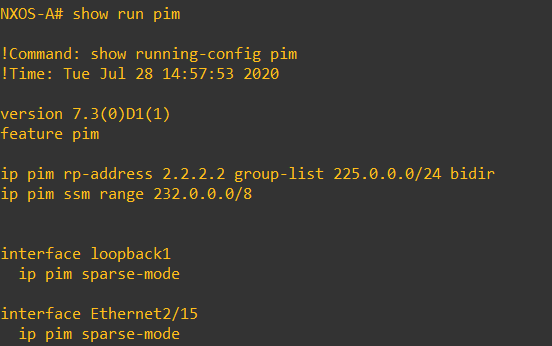
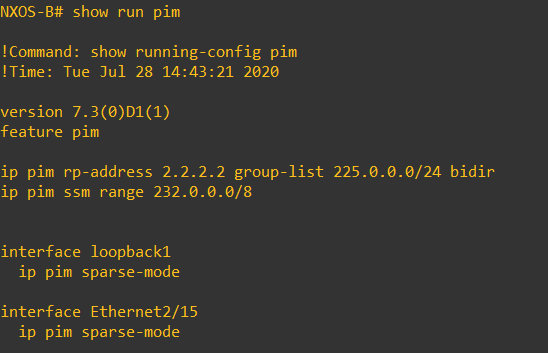
As is the OSPF, This is a Basic Multicast configuration – Static RP with Sparse-Mode. If this was a Leaf and Spine or CLOS fabric you would generally have your RP across multiple spines using Anycast RP for resiliency and load sharing
VXLAN Overlay…
Ok – Now we have configured our underlay network we can start configuring our VXLAN overlay network.
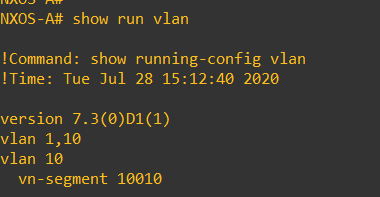
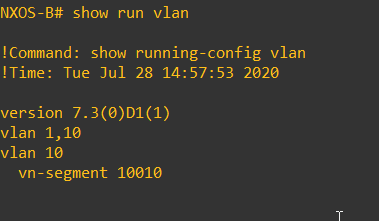
In VXLAN each VLAN corresponds to a VNI (Virtual Network Identifier) unlike the VLAN Identifier the VNI is globally significant. In order for the same network segment to be presented at each VTEP/NVE the same VNI/VLAN mappings must stay consistent across the VXLAN fabric. I have mapped VLAN 10 to VNI 10010 using the ‘vn-segment 10010′ command’.
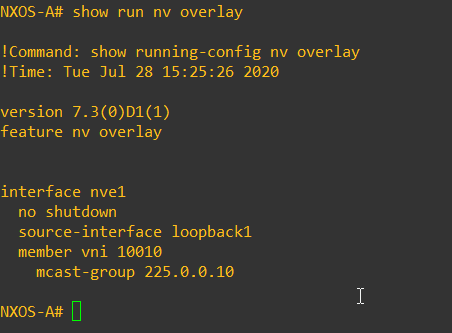
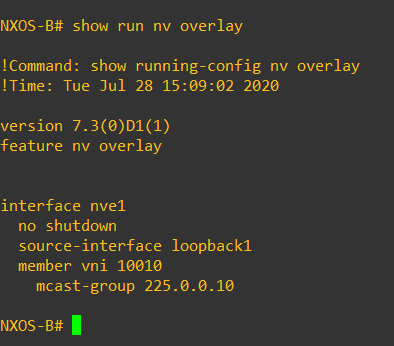
The next step is to create our NVE interfaces – these are logical interfaces that will terminate the VXLAN tunnels. When we create the NVE interfaces we specify the source address (loopback we configured previously) member VNI’s and multicast group that the VNI corresponds to – just think as this as “adding vlans to the trunk”
Verification…
Those are the basic elements in a basic VXLAN deployment – lets check everything is working as expected.
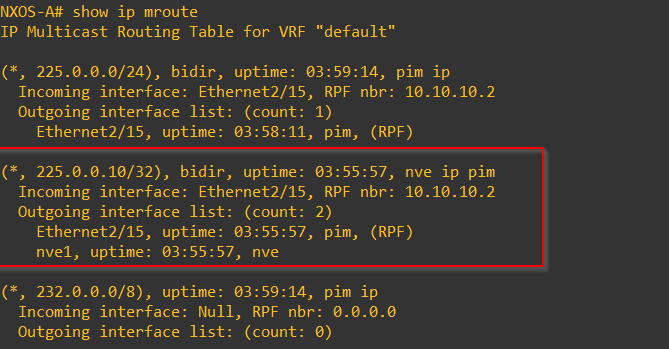
As we are using multicast forwarding lets check our mroute table and make sure we can see the multicast group that ties back to our VNI – Everything looks good we can see 255.0.0.10/32
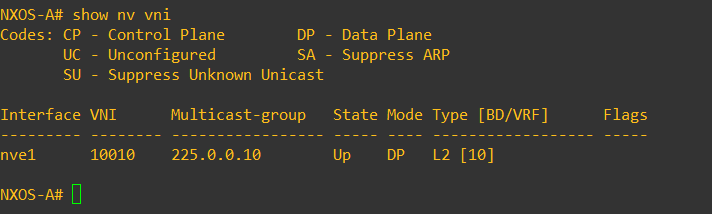
If we run show nve vni we can see the NVE interface, the VNI Membership and the multicast group it is using for transport.
Lets try and ping across the VXLAN from Server A to Server B

Success!
We have managed to extend the same segment across an L3 boundary. As stated previously this is a very basic VXLAN Lab and we have not solved all of the L2 scalability issues! We still have no control plane mechanism. To be continued….
